Dawn Powerwash Dish Spray; My Review – HaliPawz

I recently purchased some Dawn Platinum Powerwash to see how well it works. I found it at Sam’s Club and it came with the sprayer and three bottles. I figured if I ended up loving it, then I would be happy with three bottle, if I hated it, then I spent too much. As someone who does not have a dishwasher and has to wash all of her dishes by hand, I am always trying to find ways to get the dishes clean without using a lot of water. I am also limited on counter space so I try to do my dishes often rather than letting them build up.

Dawn Powerwash Dish Spray

Dawn Powerwash states that you are able to spray, wipe, then rinse the dishes. It is supposed to cut down the amount of time you spend washing dishes.

Dawn Powerwash photo courtesy of P&G

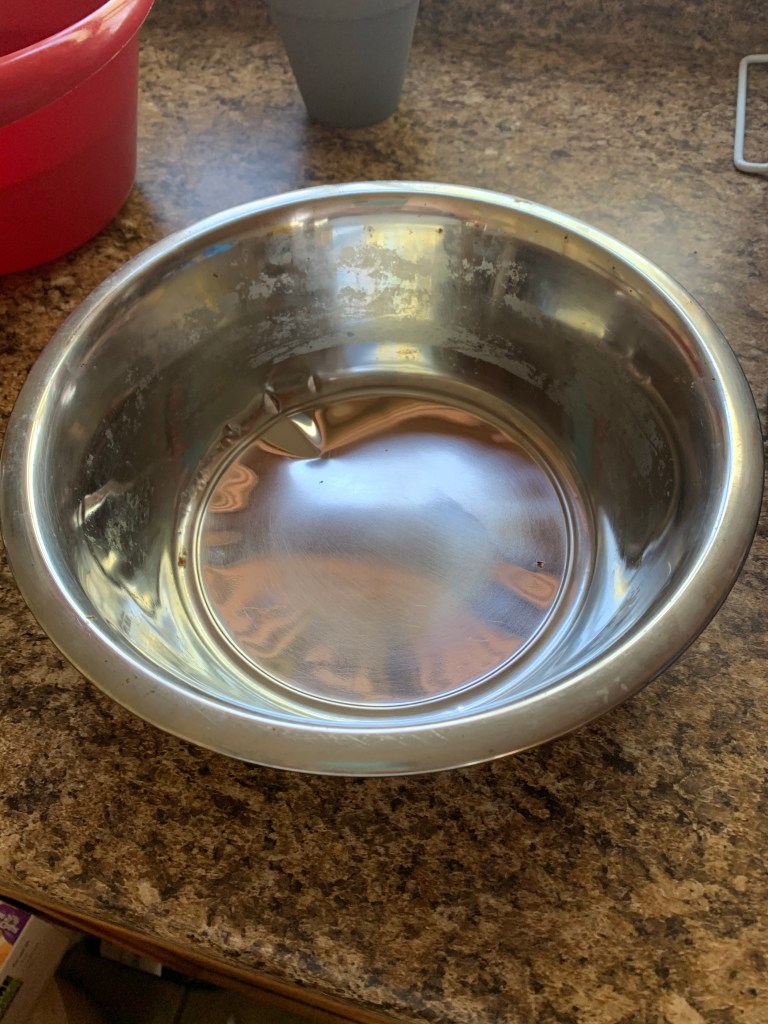
Once I was at home, I decided to think about what is something I hate to wash and I wanted to try it. I found Bella’s dog bowl. Since she is a Neapolitan Mastiff and her bowls get dirty quickly. Now I know this isn’t a typical item to wash and is a little extreme, but I figured, why not start here. I will say it has a pleasant odor to it….until it doesn’t. What I mean is, it is pleasant but if you have an exceptionally dirty dish, once it hits that dish, it may mix with the smell of whatever is on it and it doesn’t stay pleasant. It’s not putrid or too intense, but you really smell the change.

Bella’s dirty dog dish

I sprayed the bowl thoroughly

It said for heavily soiled items to let the suds sit for a few minutes. I sprayed the dish and let it sit for about 10 minutes. I figured that would be plenty of time to let the suds attack all of the dirt and grime in her bowl. The suds were completely gone (think foaming bathroom cleaner and how it disappears) when I went back. I took a couple of paper towels and wiped around the edges. I did scrub it a little bit in the heavier areas but with a paper towel, you can’t really scrub too hard.

Bella’s dish after ten minutes and one wipe

As you can see, it didn’t do a lot. It removed a little bit of the grime, but it didn’t remove a lot of it. I sprayed the dish again and let it sit for another 5 minutes. The second time was quite a bit better. More of the grime wiped out but it still wasn’t what I would call “clean”

Bella’s dish after the second spray with regular Dawn dish-soap in it

I decided to fill the bowl up with regular Dawn dish-soap and hot water to see what happened. I forgot to take the picture after the second spray until I had already started to put the soap in it so that’s what the blue stuff is in the picture above.

I let the soap sit in the dish for about 5 minutes and then washed the dish like I would normally. As you can see, it did a lot better job, but in all fairness, this was truly the third wash, so I had an expectation of it being a lot cleaner.

After the third cleaning without scrubbing really hard

I decided to use the product in normal, everyday use to see what I thought of it. I used it on a frying pan and after I wiped it clean with a normal dish cloth and rinsed it, I still felt like it was a little greasy but not bad. Almost like there was a slight film on it, but it was definitely cleaner than if I had just used water.

On lightly soiled things, it worked well. I didn’t feel like there was a film. On silverware and on plates I just used for a sandwich or something like that, it worked OK. I can’t say I am in love with it. I think squirting a little bit of dawn dish-soap on a dish cloth and using a little bit of water would get the same results without a huge difference in water use.

Here is where I will say I like it. It is a great pre-treater and cuts down on water use. I throw my dishes in the sink, including dirty frying pans, etc, I spray them lightly with a coat of the Dawn Powerwash and then after I eat, I will go in and wash the dishes with a little bit of Dawn dish-soap and the water running very lightly. The dishes get clean a lot quicker and I don’t have to rinse as long because I’m not using as much dish-soap on the cloth.

I know it may seem like overkill to use both, but I find it is truly a lot quicker to do dishes and I don’t feel like the dishes still have a light greasy feel.

I mentioned the odor earlier and I have to say I think that was just with the dog bowls and the dirt and grime from it. I haven’t smelled it on the regular dishes as much. It maintains a pleasant smell.

Overall, I would say if you have a dishwasher and you do a majority of your dishes in it, then I wouldn’t bother adding it to your dish washing options. If you are, like me, someone who has to do all dishes by hand, I think you would find it a good product to pre-treat all dishes, especially really greasy ones and you may use it to wash simple things but you still want to keep your Dawn dish-soap handy.

If you have tried the product and you love it, please let me know in the comments! I’d love to hear from you!

If you like this and want to stay up to date with my posts, follow me on Twitter @HaliPawz or Like me on Facebook.com/HaliPawz 

Garlic Pumpkin Seeds – Halipawz

Fall is here. Halloween is right around the corner. What is synonymous with Halloween? Pumpkins! I sat down tonight to carve my first jack-o-lantern and looked forward to eating the seeds the whole time. I can’t believe how many people I talk to who have not tried pumpkin seeds. I put a little twist on mine.  I make garlic pumpkin seeds. 

Pumpkin seeds, in general, are pretty easy to bake in the oven.  I do not promise they are healthy, but they are yummy! 

All you need is fresh garlic, real butter, a little sea salt, and, of course, fresh pumpkin seeds.  

Separate the seeds from the rest of the pumpkin guts and place in a small bowl.  Press about 4-8 cloves of garlic into the bowl.  I like lots of garlic so I tend to use 7-8 cloves.  It also depends on how many seeds you have.  Stir the garlic into the seeds (the seeds should still be slightly damp).  

Preheat the oven to 350 degrees. Spread the seeds out onto a cookie sheet.  Try to make it as much of a single layer as possible.  

Sprinkle a slight dusting of sea salt over the seeds.  

Cut small slivers off of two tablespoons of butter and spread out over the seeds.  Put in the over for 10 minutes.  

Remove the cookie sheet, stir the seeds, cut small slivers off of another two tablespoons of butter and spread out again over the seeds.  Place in the over for another 10 minutes.  

Remove and stir again.  Be sure to mix the seeds well and spread out again into a single layer. Cook for another 10 minutes. 

The seeds should now be a golden brown. Remove, stir one last time, and enjoy! 

Whipped Chocolate Decadence Dessert -HaliPawz

For the last three or four years, my mom had made a dessert to take out to her cousin’s house for the 4th of July. I think it’s one that has been passed around for years with a bunch of different names.  She always used the recipe in a family cookbook where different members submitted different recipes.  Over the years, I’ve made a couple changes to it to suit MY taste.  Sadly, my mom couldn’t join us for the 4th because she is going out of town with different family members later in the week, but I’m still heading out and I decided to still make this dessert to take, along with my pasta salad I shared previously.

I don’t know the original name of the dessert, so I named it what it is to ME with the changes I have made!

All I know is…it’s pretty simple to make and not that expensive. Win win for me!

Let’s start with the CRUST

Ingredients

1 Cup Flour

1/2 cup pecans finely chopped

1/2 cup (1 stick) Butter

Pre-Heat the oven to 350

Set the butter out to let it get to room temperature. In a bowl, mix the ingredients well. It will be crumbly.

Grab a pan….I use a half sheet disposable pan so I don’t have to worry about collecting a pan at the end of the night.  You can use any 9″x13″ pan though.

Pat the mixture down into the bottom of the pan well making sure to cover the entire bottom. I’m not the neatest baker, so I try to be specific for others like me!

Place the pan in the oven for 15 min. If you know your oven takes a little longer, try 17 min.

Take the pan out and let it cool completely.

Or…for a laugh, you can watch my video explaining the crust! LOL

Pecan Dessert Crust

Ingredients for the filling (the good stuff!)

First Layer:

1 package 8oz Cream Cheese.

1 cup powdered / confectioners sugar.  (May also be called 10X sugar depending on where you live)

1 1/4 cup Cool Whip (I buy an 8 oz container and it works perfectly)

Now, the baking for dummies side note….the cream cheese needs to be at room temperature (left out) and the Cool Whip needs to be thawed completely but left in the refrigerator.  Funny story, I tried to make this once and only the top was thawed.  Ended up being a mess and I had to keep stirring it to thaw it! Took forever!

Beat the Cream Cheese and powdered sugar together.  Then slowly add the Cool Whip. It should be nice, light, and somewhat fluffy.  Spread it over the cooled crust evenly.

First Layer: Cream Cheese & Cool Whip

Now, because I’m not a quick baker and I’m convinced these few minutes make a difference (yes, I know it probably doesn’t) I put the pan in the refrigerator while I’m mixing the second layer. Ok, really I have to take the time to wash the mixing bowl and measuring cups because I don’t have a lot of them! 😊

Second Layer:

2 packages Jello Instant Chocolate Pudding. (Rumor is you can do any flavor, but I never have.  You could try Butterscotch, Lemon, Pistachio….any flavor you would like in a cool treat)

3 cups milk

Another funny story….make sure it is INSTANT pudding.  Yes, I made that mistake.  To the expert bakers who are still reading this, I’m sure you’re laughing at me.  To the non-bakers, don’t worry about it, just make sure it’s INSTANT! Trust me!

Beat the two ingredients together. It will thicken, takes about 2+ minutes. Then carefully spread over the first layer, being careful to try not to mix them.  Not that it really matters, I’m sure it wouldn’t affect the taste, but just don’t do it! 🙂

Second Layer: You can see the thickness on the spatula

2nd Layer:  Instant Pudding and Milk

2nd Layer: Instant Pudding and Milk

Once you have the second layer done, you’re ready for the third layer, it’s pretty difficult, but you can handle it….

Spread the remainder of the Cool Whip over the second layer.  That’s it. Super simple.

I like to sprinkle pecan pieces over the top to make it pretty but also to make it clear there are nuts in it.  You can also put chocolate shavings on it. If you do lemon pudding, you could do something lemony, to indicate what flavor it is.

Whipped Chocolate Decadence Dessert with Pecan Topping

Whipped Chocolate Decadence Dessert with Pecan Topping

When done with the top, put a lid on it (another reason I use the disposable pan, so I can cover it with the lid and write on it with a permanent marker!)
Place in the refrigerator until time to serve.

Make sure you use a serving utensil that will cut through the crust.  If you don’t, people tend to “scoop” it out and miss the crust. If you use a disposable pan and pre-cut it, be careful not to cut right through the pan. It has happened!

I use disposable utensils as well.  If I get them back, great. If not, no big deal.  I get the pans, lids, and utensils from Sam’s Club.

When it’s time to serve, make sure you are close to the front because it goes quickly and you want to eat some!

Enjoy!

Example of a prepared dish to pass….My Pasta Salad ready to take complete with serving spoon taped to lid

If you like this and want to stay up to date with my posts, follow me on Twitter @HaliPawz  or Like me on Facebook.com/HaliPawz

Crouton Cups gone awry, sorta – HaliPawz

I am not one of those beautiful hostess types. You know, the ones whom, when you walk in their house, you ooh and ahh over the splendor of everything? Yeah, I’m lucky if I get the house cleaned and food prepared before the guests arrive.  I love to host gatherings in my home though.  My friends know the house might not be picture perfect but they will get enough to eat and drink…isn’t that all that really matters?

I was having a wine tasting in my home this past Saturday.  I’ve never been much of a wine drinker, but went to a wine tasting at a friend’s house a few years ago and fell in love with a couple of PRP International wines! I went from not drinking wine EVER to ordering a case of red wine.  I still can’t go to a restaurant and order a glass, I won’t like it, but I do love some of theirs.  I will have friends and family say they aren’t much of a wine drinker, I tell them my story, they try it, like it, and we laugh about it.  I should probably start selling it as it is the only wine I buy.

As I was planning my menu, I decided I wanted cheese of course, but I wanted appetizer type food.  I had considered meatballs, but decided I wanted cooler foods. It is June after all! Pasta Salad!

Italian Dressing, Rotini, Colby Jack

Simple, Fresh, Pasta Salad with Bacon, Cucumber, and Cheese

I really wanted pasta salad.  Wait, pasta salad isn’t exactly “finger food”. My thoughts start spinning.  I know! What if I made an edible cup to put them in? I had made Parmesan cups for Caesar Salad before but they were pretty time consuming. They were good. I was thinking about putting in the recipe I used, went to look for it, and came across this one! I HAVE NOT tried this, but it makes sense and is a LOT easier than the ones I made, so try it. Let me know if you like it or not.  If I try it, I’ll update this post.

Back to my edible cup dilemma.  I’m racking my brain and it comes to me, crouton cups! What a great idea.  Except I have no idea how to even make regular croutons, let alone a cup.  Would it be big enough? Would it even work? I’m patting myself on the back for such a great idea.  Off to Google to look for crouton recipes.  I put in “crouton cups” and site after site pops up. I realize I’m not so inventive after all.  Cooks, real cooks, have already thought of them.  I decided to not to reinvent the wheel, so I read through a few to find one I think I can manage.  This is the one I chose to work make, never planning on making any changes. Now I had no expectation of mine turning out as pretty as hers did in the photo. She recommended to use a firm bread, nothing airy.  Off to Google again to find out which bread is densest. The problem with that search is I kept finding out how to make bread less dense instead of which bread would be the densest.  I wasn’t going to bake my bread, so I had to make do with what I picked up.

I settled on Sara Lee Honey Wheat Bread. I wish I could tell you why, but no clue.  It just sounded the best for my pasta salad.

I get home and as I’m about to start making it, I’m trying to think of what seasonings to use to complement my pasta salad…and then it hits me.  The olive oil or butter from the recipe are both liquids.  The Italian dressing is a liquid. Why not change the recipe a little! It made sense to me until I put the pan in the oven.  Then I panicked as I started smelling the Italian dressing.  Can you cook dressing? Will it start on fire?!?! Am I ruining my oven?!?? All these thoughts! Now you see why I say I’m a messy cook, I normally follow recipes to avoid scares like this!

They were done!

Italian Dressing

Baked Italian Dressing Crouton Cups

And they looked croutonish! Success! Well, at least in appearance.

They didn’t look anything like the beautiful picture In the original recipe I used for a base. They looked edible, which is a start.

I let them cool while I finished preparing my other items.

I ended up serving gourmet cheese,

Gourmet Cheeses on Michigan Chalkboard Serving Tray

my pasta salad with crouton cups, deli spiral sandwiches, assorted melons, strawberries, and for my chocolate; brownie bites with cream cheese frosting available and peanut butter / Hershey kiss cookies.  As you can see, I rely on Sam’s Club for many of my hostessing items! It’s easier and less time consuming.

Now, full disclosure, my guests opted for putting my Italian Crouton Cups on their plate and then putting the pasta salad over top, they didn’t really use them in the finger food style I had imagined….but they would have worked and they tasted great!

Great food, great wine, great friends….roll it up and you have success!

For the recipe for the Pasta Salad, click here

For the recipe for the Italian Crouton Cups, click here

If you like this and want to stay up to date with my posts, follow me on Twitter @HaliPawz  or Like me on Facebook.com/HaliPawz 

Crouton Cups for Pasta Salad – HaliPawz

Italian Dressing

I shared my crazy steps to get to this recipe here, but I figured I would make it easy to navigate by putting it in simple form for those interested in JUST the recipe and not the story!

Ingredients:

12 slices of bread (I used Sara Lee Honey Wheat Bread but any regular bread would work)

Italian Dressing

Set the oven to 375 degrees

Trim the crusts off the bread slices. You want them somewhat square in shape, but mine were definitely not even!

Flatten the slice.  You can use a rolling pin for evenness if you prefer. I just used my hand.

Baste the bread on both sides with the Italian dressing, don’t over saturate! That was my mistake with my first batch.  Make sure you get all the way to the edge.

italian dressing

Trimmed Bread Slices for Crouton Cups

Next, pick the slices up and carefully place in a muffin / cupcake tin.  They will be slightly soggy, so the weight will pull them to the bottom with little help from you.  Let them slide in, then position the corners so they are up, out of the tin.  Be careful not to tear the bread

bread in muffin tin for crouton cups

Place in the oven 13-16 minutes, making sure not to burn them, but you want them to be crisp.

They will come out nice and brown, let them cool about 5-10 minutes, then pop then out of the tin and place in a flat surface to finish cooling.

Baked Italian Dressing Crouton Cups

When ready to serve, carefully fill cups with pasta salad and serve! Nice way to have pasta salad as an appetizer.

If you like this and want to stay up to date with my posts, follow me on Twitter @HaliPawz  or Like me on Facebook.com/HaliPawz 

My simple Pasta Salad – HaliPawz

Italian Dressing, Rotini, Colby Jack

You can read the whole story of my experience with Crouton Cups and Pasta Salad here, but I thought I would share my recipe for my favorite pasta salad. I’m not a fan of salads made with mayonnaise, so I like the freshness of this one.  It’s pretty quick to make and goes quickly at every event I take it too.

Italian Dressing, Rotini, Colby Jack

Simple, Fresh, Pasta Salad with Bacon, Cucumber, and Cheese

Ingredients:

Pasta – I generally use Barilla Tri-Color Rotini but I have used Wal-Mart’s Great Value as well.

Italian Dressing – I have always used Wishbone Robusto Italian Dressing but this past one, I used Olive Garden’s Italian Dressing because that’s what Sam’s Club had and I didn’t want to go anywhere else. I liked it ok but will stick with the Wishbone in the future. If you’re a fan of Olive Garden, you’ll like either one.

Bacon – Just eliminate if you want vegetarian style

Cucumber

Colby Jack Cheese – I do the block of cheese from Sam’s Club and cut it to save some money, but you can also buy the cubes.  You can mix sharp cheddar cubes and Colby Jack cubes as well.

If you use the block cheese, I highly recommend a great cheese knife. I use the wavy pampered chef one, but couldn’t find it on their site to share, so not sure if it’s still available.

cheese knife, michigan, cutting, board

Pampered Chef Cheese Knife on Michigan Cutting Board

I throw the bacon on my Pampered Chef bar pan on 350 degrees.  After about 20-25 minutes, I check it.  For this salad, you’ll want it more on the crispy side, so it may take a little longer or shorter depending on your oven and how crispy you want it.
While the bacon is in the oven, I start my water to boiling. Prepare your pasta to the directions on the box.  Drain and rinse with cold water.

In a large bowl, add about a quarter of the dressing to the pasta.

Peel the cucumber and cut into small bite size pieces.  I generally quarter it lengthwise then slice it. Add to the pasta, stir.

Next add your cheese.  Again, bite size.  Big enough to taste the cheese though. Stir in about another quarter of the dressing bottle at this time.

Stir well then cover and place in the refrigerator until the bacon cools and you can add it.  This gives the pasta time to absorb the dressing.

Once the bacon is ready, if you went extra crispy, just crumble it into the salad. I like mine crispy, but not crumbly, so I usually tear and crumble.

Add more dressing, stir, and place back in the refrigerator.

As I have said, I am not a “pretty” cook.  My dishes don’t look perfectly made, things aren’t evenly sliced, but for me, as long as it tastes great, I’m happy!

Leave in the refrigerator for at least one to two hours, giving time for the pasta to truly take on the flavor of the dressing.  You can prepare it the day before, just add a little more dressing in the morning.

Before serving, add a little more dressing to keep it from tasting dry, stir it up again.  Taste.  If you want more flavor, add more dressing.

I usually use one whole bottle (16 oz) per box of pasta.  Just remember to not add as much the day you are preparing if you are serving it the following day.

I will add, I don’t think the Olive Garden dressing sticks to the pasta as well as the Wishbone dressing does. It tasted good the first day but I could barely taste it the next night.  I was surprised because, to me, the Olive Garden dressing has a little bite to it.

Either way, it is a great salad for a hot day.  Fresh and, with the cucumber, nice and crisp.

Enjoy!

If you like this and want to stay up to date with my posts, follow me on Twitter @HaliPawz  or Like me on Facebook.com/HaliPawz 

Copycat Chipotle White (Basmati) Rice – HaliPawz

Basmati Rice, Cilantro, Copycat recipes

Earlier I posted the story of why I decided to try to make my own Chipotle style meal at home, but I wanted to post just the rice recipe by itself.  It is good enough to make on it’s own.

CopyCat Chipotle Basmati (White) Rice

Ingredients

1 tbsp butter

(I always cook with real butter, you can also use 1 tbsp oil)

1 Cup Basmati Rice

2 cups water

1/2 tsp kosher salt

1 lime

2 tbsp Fresh Cilantro

Melt the butter over a medium heat, add the rice and saute it.  You want it to have almost a translucent (or wet) appearance.

Add the water, turn the heat up to high, and bring it to a boil.

As soon as it begins to boil, turn the heat down to low, place your lid on your pan, and let the rice simmer for 15-20 minutes.  You want the water to be absorbed

Turn off the heat.  Now the tough part….and trust me, you will be tempted, but DO NOT LIFT THE LID for 30 minutes after you turn off the heat.  The steam will help the rice be nice and fluffy and you want fluffy rice.  🙂

While it is steaming, in a small dish, mix the salt and the lime juice together until the salt is dissolved.  You can also get your cilantro ready at this time.  If you know how to chop cilantro with a knife, go for it, but I use my mini chopper because it works best for me.

After the tortuous, tempting 30 minutes of steaming WITHOUT CHECKING ON IT…..lift the lid, allowing the steam to escape and put the rice into a mixing bowl. Fluff the rice with a fork while adding the salt / lime mixture.

Add the cilantro slowly while continuing to fluff.

My Chipotle Night at Home: Steak Bowl with White Rice, Chips & Mild Pico – HaliPawz

Chipotle, Copycat recipe, Basmati Rice

I love Chipotle.  It is one of those restaurants I could eat a couple nights a week.  There are times when I’m driving home at night and will weigh the cost of Chipotle over another fast food restaurant and Chipotle will almost always win.  One day recently, I started thinking about it and realized I am spending money for four ingredients.  I get the steak bowl with white rice, cheese, and lettuce.  I already make their Chips & Pico De Gallo so I wondered how difficult would it be to make their white rice and their steak?  I decided to tackle the task.  I was going to have Chipotle at home, I was going to attempt to make their steak bowl with the white rice to go with my Chips & Pico De Gallo.

I’m not a fancy cook.  I’m not someone who can just whip stuff together.  I use recipes when I’m trying something new.  After I’ve made it a few times, I might tweak it here or there to get it where I want it.

Let’s start with the rice. I have to admit, I have never made rice before.  Not in a real way.  I would buy box versions of flavored long grain and wild rice, but never a bag of rice I was preparing from scratch.  I didn’t even know there were so many varieties of rice.  I started doing research and learned I had to use Basmati rice.  I was excited.  I knew if it turned out well, I would probably make it often because I really like the rice.  After looking at a few different recipes for both the rice and the steak, I decided what I liked or didn’t like from various recipes to create my own.

CopyCat Chipotle Basmati (White) Rice

Ingredients

1 tbsp butter

(I always cook with real butter, you can also use 1 tbsp oil)

1 Cup Basmati Rice

2 cups water

1/2 tsp kosher salt

1 lime

2 tbsp Fresh Cilantro

Melt the butter over a medium heat, add the rice and saute it.  You want it to have almost a translucent (or wet) appearance.

Add the water, turn the heat up to high, and bring it to a boil.

As soon as it begins to boil, turn the heat down to low, place your lid on your pan, and let the rice simmer for 15-20 minutes.  You want the water to be absorbed

Turn off the heat.  Now the tough part….and trust me, you will be tempted, but DO NOT LIFT THE LID for 30 minutes after you turn off the heat.  The steam will help the rice be nice and fluffy and you want fluffy rice.  🙂

While it is steaming, in a small dish, mix the salt and the lime juice together until the salt is dissolved.  You can also get your cilantro ready at this time.  If you know how to chop cilantro with a knife, go for it, but I use my mini chopper because it works best for me.

After the tortuous, tempting 30 minutes of steaming WITHOUT CHECKING ON IT…..lift the lid, allowing the steam to escape and put the rice into a mixing bowl. Fluff the rice with a fork while adding the salt / lime mixture.

Add the cilantro slowly while continuing to fluff.

For just the Rice recipe without everything else, click here.

Basmati Rice, Cilantro, Copycat recipes

Copycat Chipotle Rice

 I always get the steak option when I go to Chipotle.  I love it.  As I am not a fan of spicy food, there are times I do feel like I would like it better if it wasn’t quite as spicy at times.  By making it at home, I realized I could control the spice level.  Many of the ingredients are used in my Pico De Gallo recipe as well, so it’s a great way to not waste ingredients when you make them at the same time.

Copycat Chipotle Steak Marinade

Makes four 8oz servings

2lbs Steak of your choice

(Recommend Skirt, Sirloin, or Ribeye)

1/2 cup Cilantro (Finely chopped)

1/2 Jalapeno

(Remove the seeds for a milder taste)

6 cloves of garlic

1/2 red onion

1/2 tsp Cumin (use up to 1 tsp to taste)

1/2 tsp kosher salt (or sea salt)

1/4 olive oil

1/2 tsp Crushed Red Pepper (use up to 1 tsp to taste)

1/2 tsp pepper

Mix all of the ingredients together in a bowl.  Rub the mixture onto the steak making sure to coat both sides really well.

Place the steak into the refrigerator for at least an hour but not longer than 24 hours.  The longer it marinates, the richer the flavor.  I recommend about 2-4 hours.

Prepare the meat either on the grill or by heating up some olive oil in a pan to medium heat and then searing the steak.  Cook the steak to 135 degrees (Medium rare)

Remove the steak from the heat and let it sit for 5 minutes (this allows the juice to set and helps maintain the flavor)

Cut the steak into bite size pieces by cutting lengthwise then across with the cuts about an inch apart.

To make the Bowl

Put a layer of rice on your plate or bowl

Add the steak

Sprinkle with a combination of shredded white cheddar and Monterrey jack cheese

Add lettuce

I didn’t have the right cheese in the house so I ended up using a mixture I had, that is why it’s yellow cheese in the picture, but trust me, I will make sure to use my shopping list at the bottom of this post to make sure I don’t forget the cheese again!

(That’s the end of mine, but you can top with anything else you would like….guacamole, pico, sour cream)

ENJOY!

To make it easier, here is a shopping list for this whole meal

  • 2 lbs Steak
  • Fresh Cilantro
  • 1 Jalapeno
  • 1 Red Onion
  • 3 Limes
  • 6 Roma Tomatoes
  • Basmati Rice
  • Fresh Garlic
  • Bag of White Tortilla Chips
  • Shredded White Cheddar Cheese
  • Shredded Monterey Jack Cheese
  • Lettuce

You will also need the following if you don’t already have at home

  • Kosher Salt (or sea salt)
  • Cumin
  • Olive Oil
  • Butter
  • Pepper
  • Crushed Red Pepper
  • (Vegetable Oil if substituting for the butter)

Copycat Chipotle Chips and Pico De Gallo; My Version – HaliPawz

Copycat recipes

I love Chipotle’s Chips and mild Pico De Gallo.  I’m odd.  I do not like tomatoes but I love Pico, Salsa, etc.  I won’t put a tomato slice on a burger but I’ll put tomatoes and other ingredients on a tortilla chip.  I really wanted to try to make it at home but I was afraid it would be a passing fancy and I didn’t have a food chopper, which I thought I had to have to make it, so I went on the search for one. I found one at Wal-Mart for less than $10, Rival Mini Chopper.  Even though the version has changed slightly, they still have one available for less than $10.

I could not wait to try it out.  I checked the internet for recipes for the Pico and found a few different versions.  After trying it a few ways, I have finally come up with a recipe I like and have made it many times.  My friends and family love it so I must be doing something right with it.

Fun Fact….What is the difference between Pico De Gallo and Salsa?  While they are both very similar, Pico De Gallo is always fresh, made with fewer ingredients cut more in into chunks, and served chilled.  Salsa is cooked, more of a sauce, and may contain more ingredients.  You can make salsa ahead of time and preserve it by canning it which you can not do with Pico because it needs to be served fresh.

I have learned from experience my Pico recipe only lasts about a day to a day and a half and then the flavor doesn’t taste the same and needs to be thrown away so you don’t want to make up too much at one time.  I will say it goes quickly though, so don’t be surprised if your family or friends start eating and don’t stop.  I would say to make one serving per every four to six guests depending on how much food you are serving with it.  I usually put the Pico out ahead of the food for my guests to munch on while they are waiting for the food, so I go through more of it.

Over quite a few trials and errors, I am going to be specific about how I prepare it to maximize texture and flavor.

Ingredients

6 Roma Tomatoes

3/4 Cup Cilantro

1/2 Jalapeno

(Remove Seeds for Mild Version)

1/2 Medium Red Onion

1 1/2 Teaspoon Kosher Salt (or Sea Salt)

1 Lime

Because I am not an expert cook by any means, I am going to be pretty detailed with how I prepare everything to help those, like me, new to experimenting with things outside of meat and potatoes or pasta.  It is pretty easy.  As you prepare each item, just throw it into a mixing bowl.

Starting with the Roma Tomatoes, wash them in cold water, cut them in half lengthwise and scoop out the seeds and juice.  I use a spoon to make sure I have all the seeds out and then place it down so the remainder of the juice runs out while I cut the other tomatoes. Make sure you are using a sharp knife.  It is the best way to cut the tomato without “squishing” it.  The sharper the better, just be careful.  I don’t cut the top of the tomato off until I’m ready to start dicing it, I have found it is easier to scoop the seeds and liquid out if the top is still intact.

I learned the hard way NOT to use the food chopper for the tomatoes.  Dice them with a knife.  It may take a few minutes longer if you aren’t used to cutting food up that small, but it is worth the extra time.  I used to take me about 45 min to do a serving (yes, I’m extremely slow when I’m first making something because I have to keep going back to the recipe, I’m extra careful cutting, etc) but now I can usually have it done in 15 min or less if I’m just making one serving.

I have found a couple links to show how to dice a roma tomato that were helpful to me when I was starting out.  I also have to thank my sister because she was the one who pointed out it would be easier and less of a mess to cut them instead of putting them in the chopper when she was helping me prepare it one day.  Here is one link I found though to help  you with a visual:  How to dice a Roma Tomato  

If you would like a little juicier Pico and you don’t want to remove the seeds, you can also dice it this way.  Video how to dice a Roma Tomato  What did we do before the internet to help us figure all of this out?

Cilantro – I can not cut Cilantro.  I have followed the steps, I have looked it up many times and have learned, it’s ok, just use the food chopper!  So, if you are talented with a knife and comfortable cutting up cilantro, then go for it.  If you’re like me, don’t feel bad.  The chopper was invented for people like us.  Wash the cilantro really well, pat it dry with a paper tower, pull out any wilted or discolored pieces.  Cut the stems off and throw them away.  Throw the leafy part in the chopper.   I usually let it cut it up until it doesn’t look like it’s doing anything anymore, take a small spatula to push the cilantro down off the sides, and run it again for a few seconds.  It’s easiest to then scrape it into a 2 cup glass measuring cup so you can see how much you have cut up.  Once you get more comfortable making it, you will find you don’t need to measure any more, but for starting out, for me, it was the easiest way and dumped out of the glass measuring cup smoothly.

Don’t bother washing out the chopper.

If you want to try your hand at cutting it instead of using the chopper, WikiHow has a pretty detailed example.  

Jalapeno –  Wash the jalapeno, cut the top off, and then cut it lengthwise.  Make sure to get all of the seeds out if you want it to be mild.  I throw the seeds away so they don’t accidentally get mixed in with the pepper while I am cutting it up.  They are sneaky buggers and attach easily!  You dice it up pretty much the same way you do the Roma Tomato.

Red Onion –  Cut the red onion in half and I cut off both ends. I peel off the outside skin.  Then I cut the half into quarters, throw it into the chopper, and let it work it’s magic.  Yes, I know you can dice it yourself, but honestly, the chopper is less complicated for me.  I throw the onion in the mixing bowl with the other ingredients and mix it all up.

Add the Salt – I usually stir it once or twice

Lime – Roll the lime against the counter with your hand.  This is a tip I learned a long time ago to get more juice out of a lemon, tried it and found it helps with the lime as well.  You want as much lime juice as you can get from it.  I also read where you could put it in the microwave, but I never do that, I just roll it along the counter.  Cut it in half and then you can either squeeze it directly into the bowl of ingredients or use a juicer. You don’t need anything fancy to get the juice from the lime into the bowl.  Do not throw the lime away just yet, just set aside.

Mix everything together one last time and then I will transfer to a container with a lid and place in the refrigerator to chill for at least 30 minutes.

For the Chips – I LOVE the chips you get from Chipotle so I will usually grab a bag of white tortilla chips from the store, dump half the bag into a large plastic bowl with a lid, take one half of my squeezed lime and hand squeeze any last lime juice I can over the chips, sprinkle with a little bit of salt, put the lid on them, and shake it gently to distribute the juice and salt.  Add the other half, using the other lime half, repeat with the lime juice and the salt, shake gently again, and you have some yummy chips to go with your Pico De Gallo.

Enjoy!